Ready to make this Easter the most creative one yet? Forget the same old bunny-shaped cookies; this year, we’re diving headfirst into a world of delightful Easter crafts that will leave everyone utterly impressed. Whether you’re a seasoned crafter or a complete beginner, our collection of 17 fabulous Easter crafts offers something for every skill level and taste. Prepare to be inspired by unique ideas that go beyond the ordinary, transforming your home and celebrations into a vibrant Easter wonderland.
This article isn’t just a list; it’s your ultimate guide to crafting unforgettable Easter memories. We’ve gathered the most innovative and visually stunning Easter crafts, complete with easy-to-follow instructions and inspiring visuals. From adorable bunny decorations to breathtaking egg designs and charming springtime accents, you’ll find projects that are both fun to create and incredibly rewarding to display. Get ready to unleash your inner artist and add a touch of handmade magic to your Easter festivities.
Get ready to be amazed as we unveil 17 extraordinary Easter crafts that are guaranteed to impress. From simple yet elegant projects perfect for a quick crafting session to more elaborate creations that demand a bit more time and attention, we have something for everyone. Let’s embark on this creative journey together and transform your Easter celebrations into a spectacular handmade masterpiece! Here are our top picks…
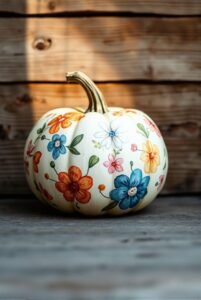
Delicate Floral Easter Eggs
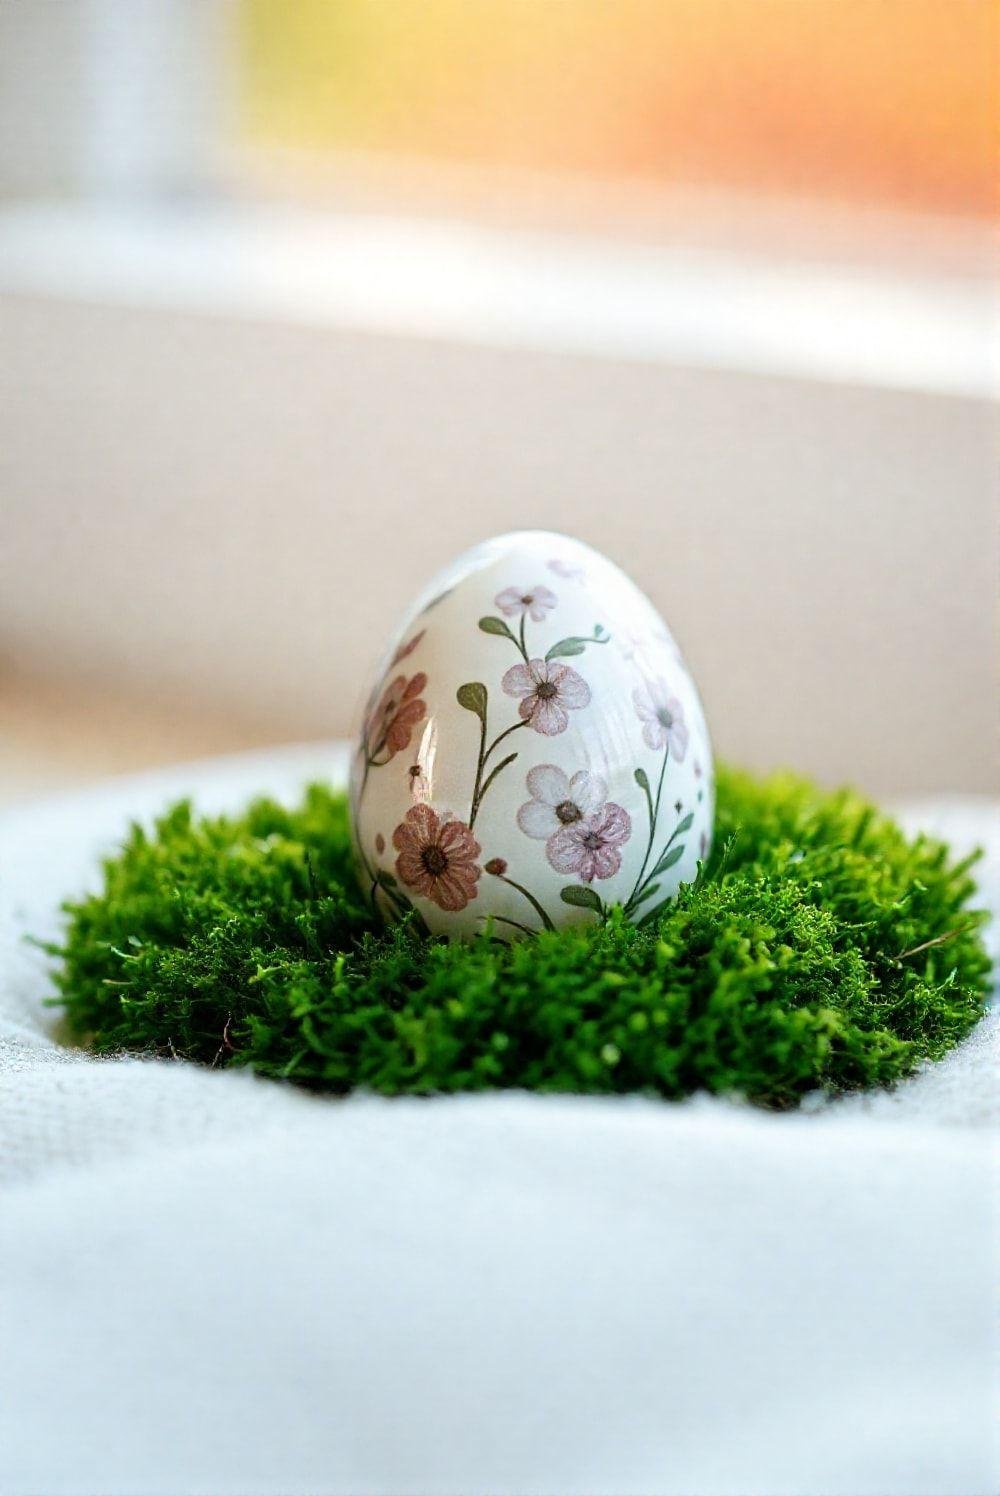
Create a stunning centerpiece with these hand-painted ceramic Easter eggs. Start with plain white ceramic eggs, available at most craft stores. Use high-quality acrylic paints in pastel shades to create intricate floral designs. Thin your paints slightly for a smoother application and allow each layer to dry completely before adding another. Once dry, seal your masterpiece with a clear varnish for a lasting shine.
For added texture and dimension, consider incorporating small details like tiny gold accents or glitter. You can also experiment with different painting techniques, such as watercolor washes or dry brushing, to achieve unique effects. Display your finished eggs in a shallow basket lined with moss or nestled amongst spring blossoms for an elegant presentation.
These delicate eggs make a wonderful gift or a beautiful addition to your Easter table setting. The process of painting allows for creativity and personalization, making each egg a unique work of art. Remember to let your creativity flow and enjoy the process of crafting these beautiful Easter decorations!
Whimsical Felt Flower Birdhouse
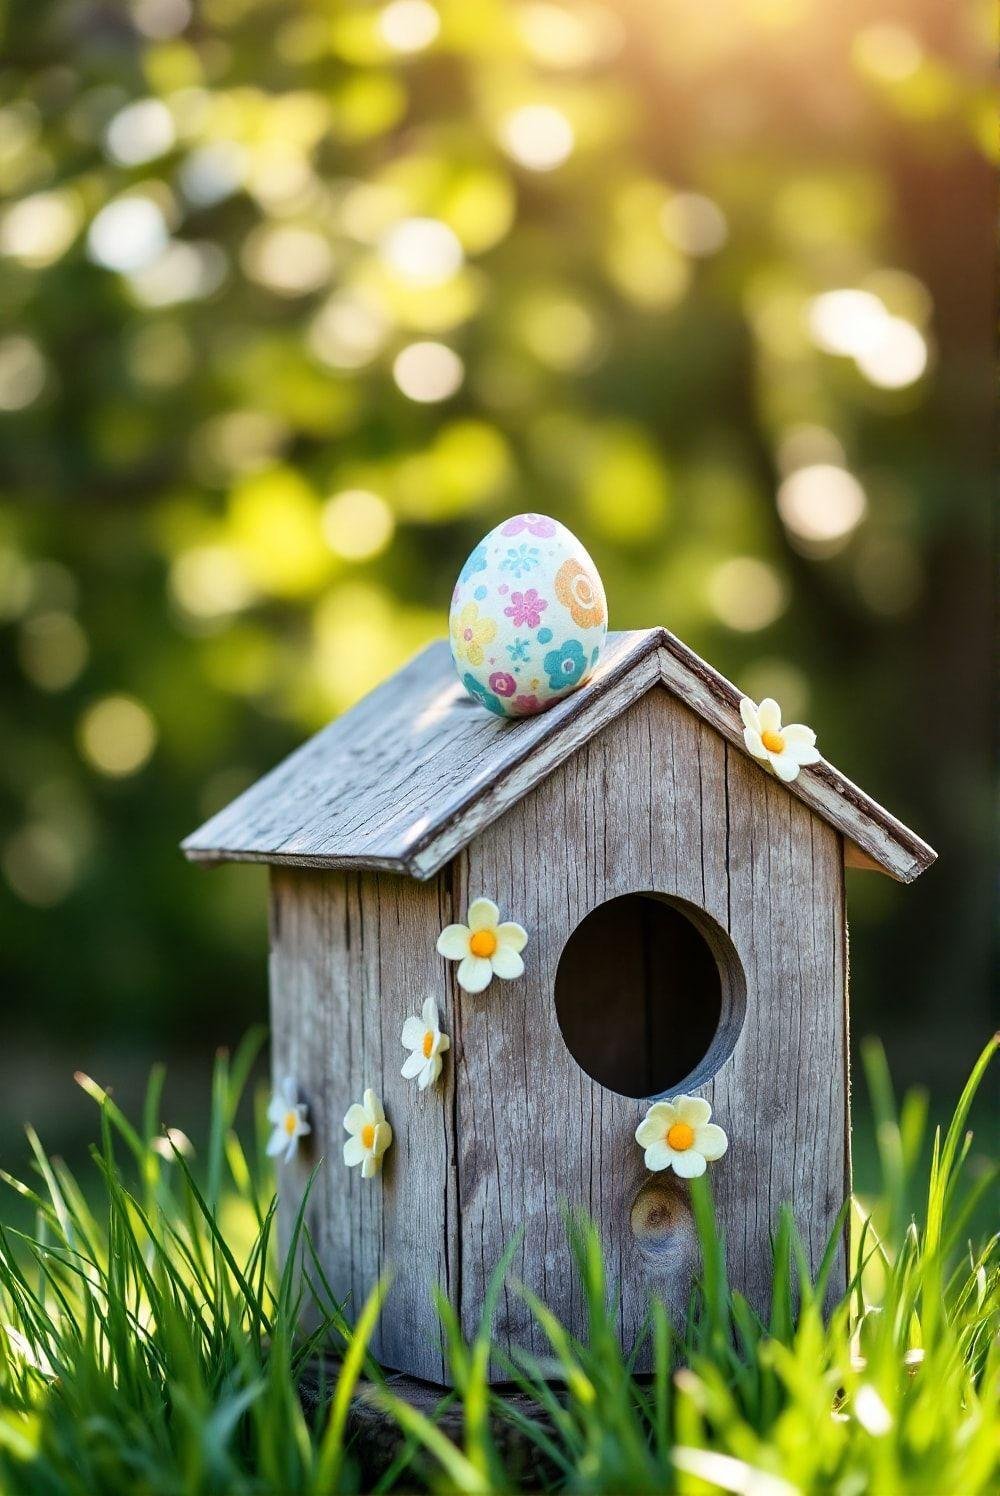
Transform a simple birdhouse into a charming Easter decoration. Choose a small, rustic wooden birdhouse – the weathered look adds character. Cut out various shapes and sizes of felt flowers in pastel colors such as pink, lavender, and yellow. Use a hot glue gun to carefully attach the felt flowers to the birdhouse, creating a whimsical floral arrangement.
Add a small, hand-painted Easter egg to complete the scene. You could use a miniature egg or even a small ceramic bead painted to resemble an egg. The egg adds a touch of Easter magic to the birdhouse. Consider placing the birdhouse on a small branch or ledge for a natural display.
This simple craft project is perfect for adding a touch of spring to your home decor. The combination of natural wood, soft felt, and a painted egg creates a delightful and festive Easter centerpiece. The birdhouse can be hung outdoors to welcome spring or placed indoors on a mantelpiece or shelf.
Intricately Woven Easter Baskets

Impress your guests with these intricately woven Easter baskets. Start by gathering natural materials like willow branches, reeds, or even colorful straws. You will need a basic understanding of basket weaving techniques or access to a tutorial to guide you through the process. Different weaves create unique textures and patterns.
Begin by preparing your chosen material—soak it in water to make it more pliable. Then, following your chosen weaving technique, carefully construct the basket, ensuring the weave is tight and even. Use strong, natural twine or cord to secure the edges and create a finished look.
Experiment with different colors and textures of weaving material to create a variety of unique Easter baskets. These handcrafted baskets can be used to hold Easter eggs, candies, or small gifts. They also make beautiful decorations on their own, adding a touch of rustic charm to any Easter setting.
Pastel Ribbon Easter Jars
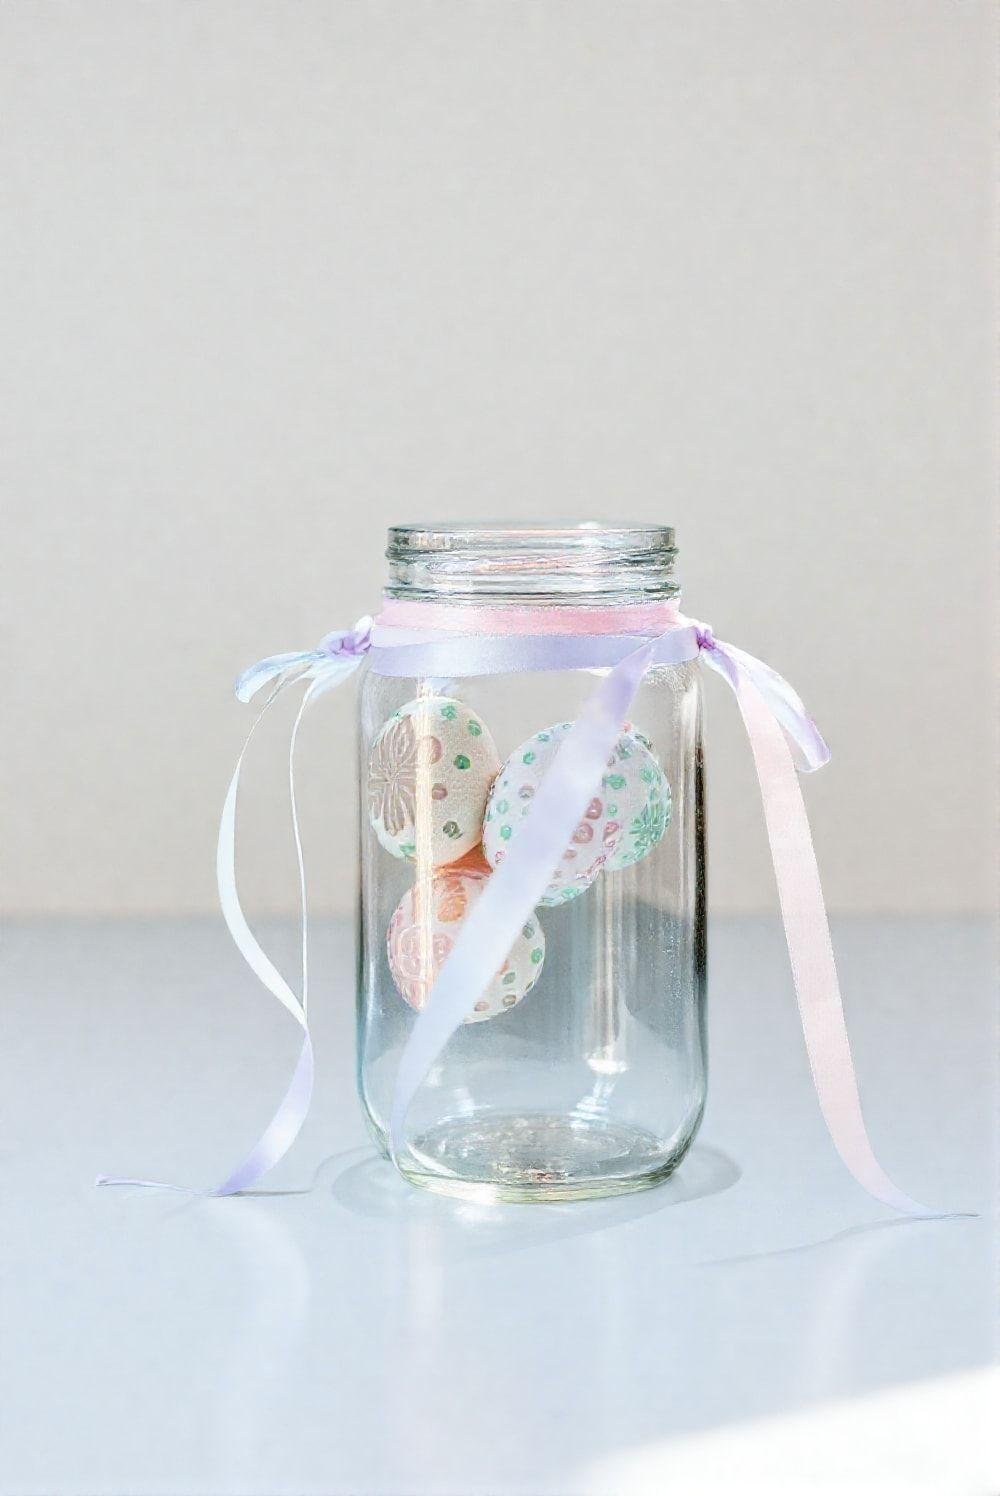
This Easter craft is simple yet elegant. Gather clean glass jars of various shapes and sizes. Choose pastel-colored ribbons in shades of pink, blue, lavender, and yellow. Cut the ribbons into varying lengths and use them to decorate the jars. You can tie them in bows, create vertical stripes, or even wrap them around the jar entirely.
Fill the decorated jars with colorful Easter eggs. Use a mix of solid colors and patterned eggs for a vibrant display. For an extra touch, add a few sprigs of fresh spring flowers to the jars. Place the jars on a windowsill or mantelpiece to create a cheerful Easter display.
These decorated jars make charming Easter gifts or table decorations. The simple design allows for creativity and customization, making each jar unique. The project is quick and easy, perfect for a last-minute Easter craft project.
Hand-Painted Terracotta Easter Pots
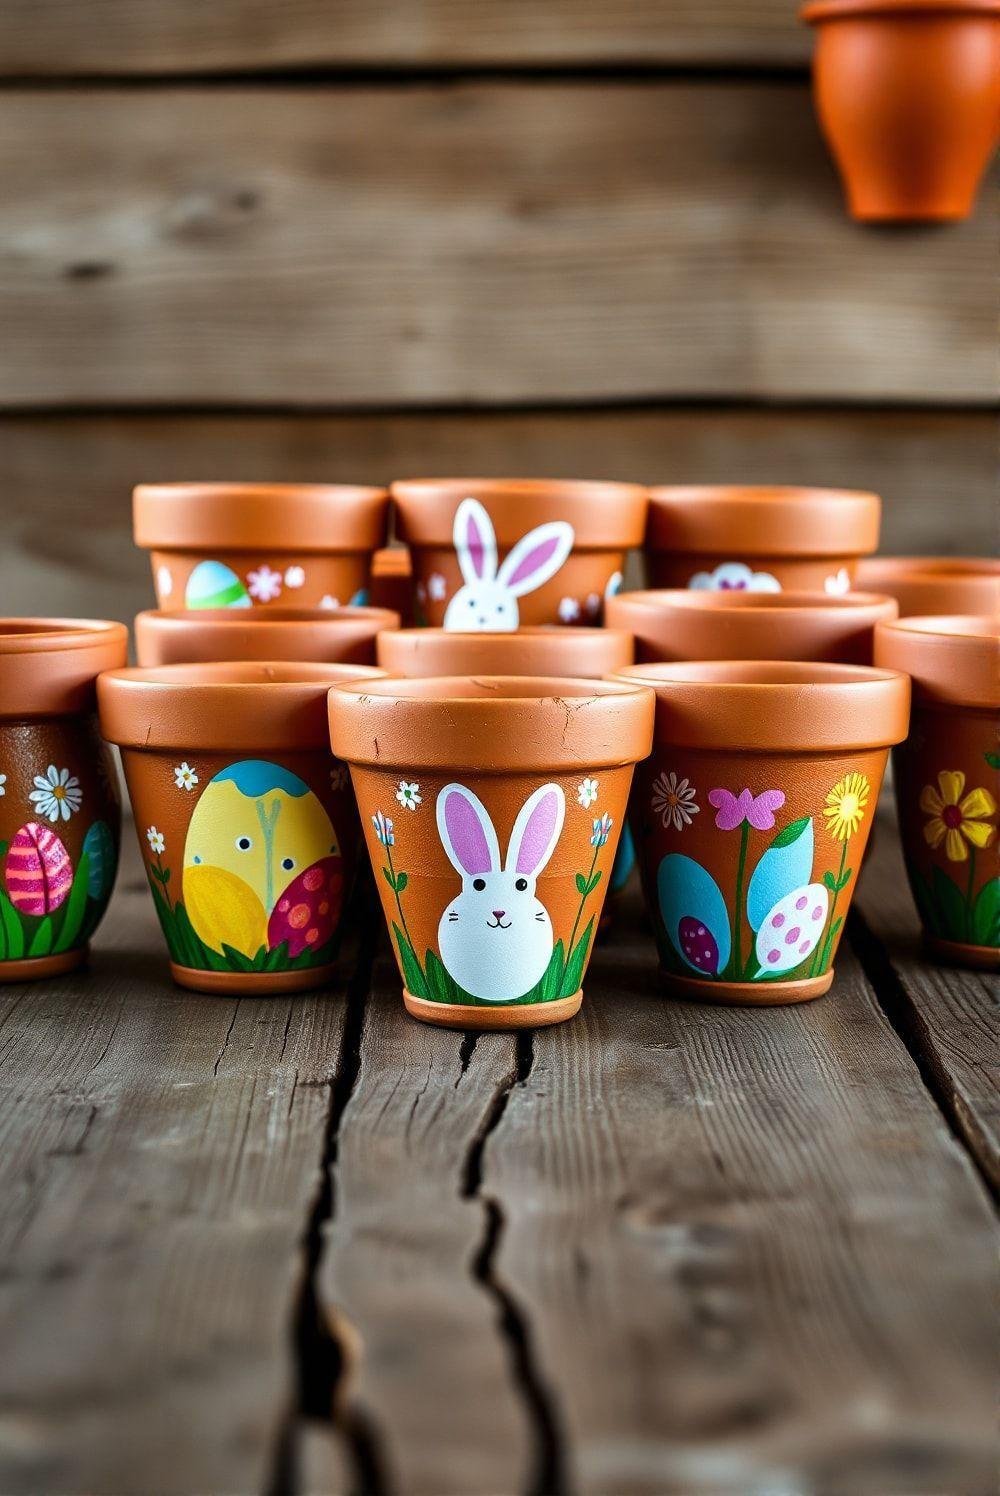
Add a touch of rustic charm to your Easter decor with these hand-painted terracotta pots. Start with plain terracotta pots of various sizes. Clean the pots thoroughly and allow them to dry completely. Use acrylic paints in a variety of colors to create unique Easter-themed designs. You can paint simple patterns, floral designs, or even cute Easter bunnies.
Consider adding small details like glitter, sequins, or other embellishments to add extra texture and shine. Once the paint is dry, seal the pots with a clear varnish to protect your artwork and give it a glossy finish. The pots can be used to plant spring flowers or simply displayed as decorative items.
These charming hand-painted pots make wonderful gifts or unique additions to your Easter table setting. The rustic terracotta provides a beautiful backdrop for your creative designs, while the variety of sizes allows for a versatile display.
Intricately Carved Wooden Easter Bunny
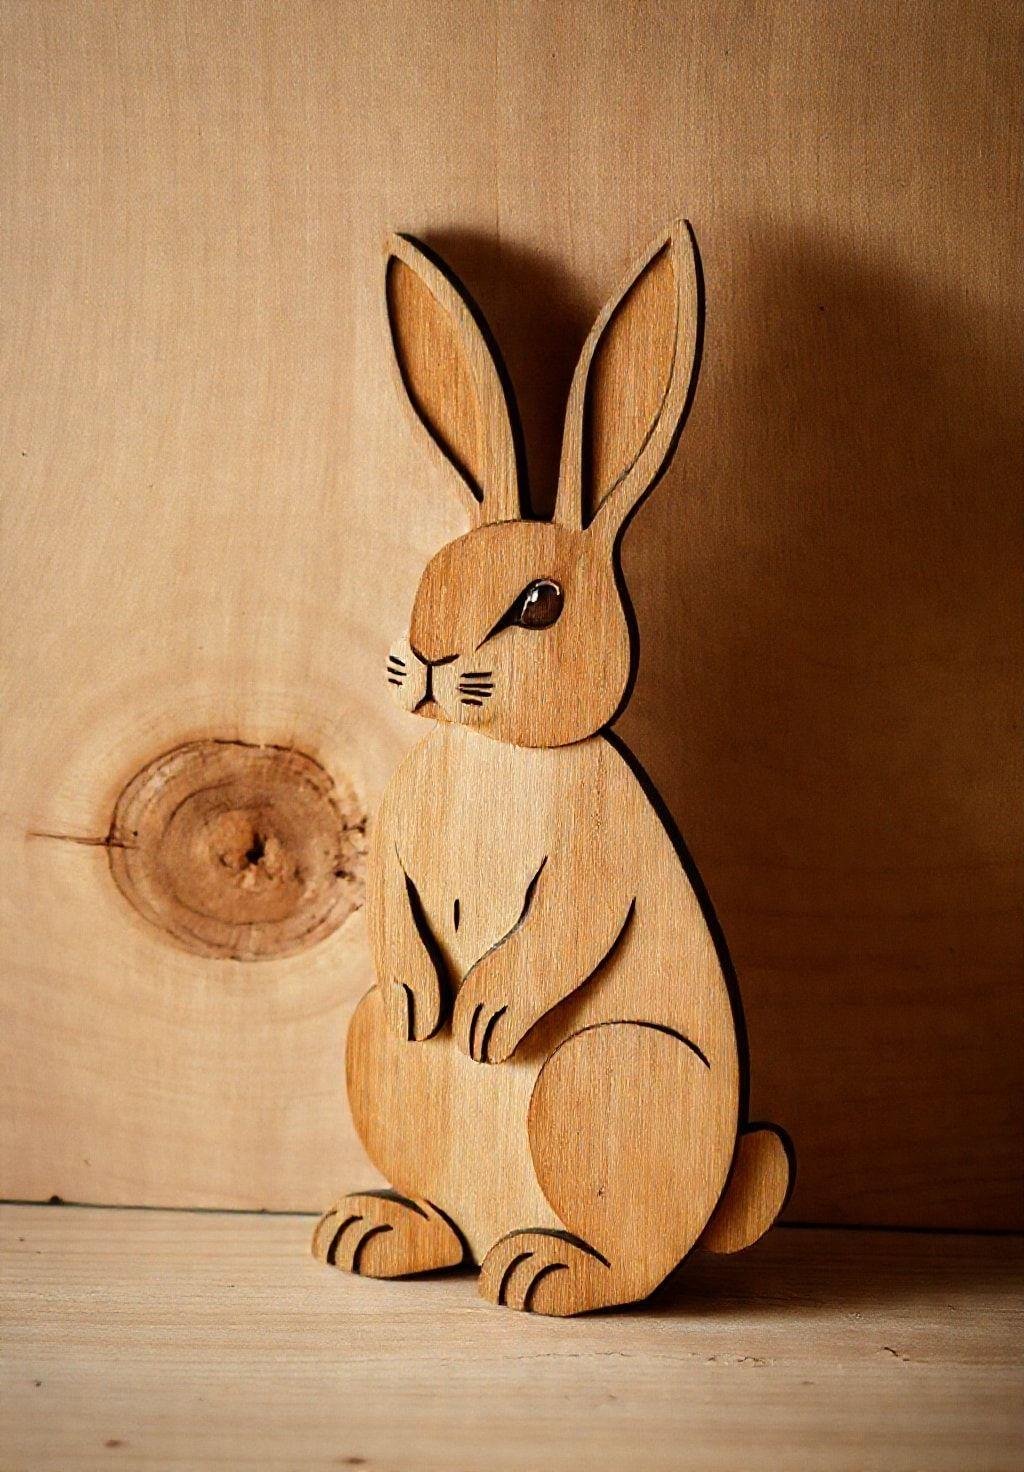
Craft a charming wooden Easter bunny using simple woodworking techniques. Start with a piece of high-quality wood, such as basswood or pine. Sketch your bunny design onto the wood using a pencil. Then, carefully carve the design using various carving tools, paying attention to detail and creating a smooth, refined finish.
Once the carving is complete, sand the wood to remove any rough edges. Apply a natural stain or paint to enhance the wood’s grain and bring out the details of your carving. You can also use natural pigments to add subtle color variations to your bunny.
This intricately carved wooden Easter bunny makes a beautiful and unique addition to your Easter decor. Its rustic charm and natural colors make it a perfect fit for a variety of styles. The project requires some woodworking skills, but the result is well worth the effort.
Decoupage Easter Eggs

Elevate your Easter egg decorating with this elegant decoupage technique. Start with a plain white or pastel-colored egg. Choose high-quality decoupage paper with a vibrant spring scene, such as blooming flowers or playful bunnies. Cut out the desired images from the paper, ensuring clean edges.
Apply a thin layer of decoupage medium to the surface of the egg. Carefully position the chosen images onto the egg, smoothing out any air bubbles or wrinkles. Apply another thin layer of decoupage medium over the images to seal them and ensure a smooth finish. Allow the medium to dry completely.
This beautifully decorated egg makes a stunning centerpiece or a unique gift. The decoupage technique allows for endless creative possibilities, making each egg a one-of-a-kind work of art. Remember to use high-quality materials for a professional finish.
Painted Stone Easter Egg
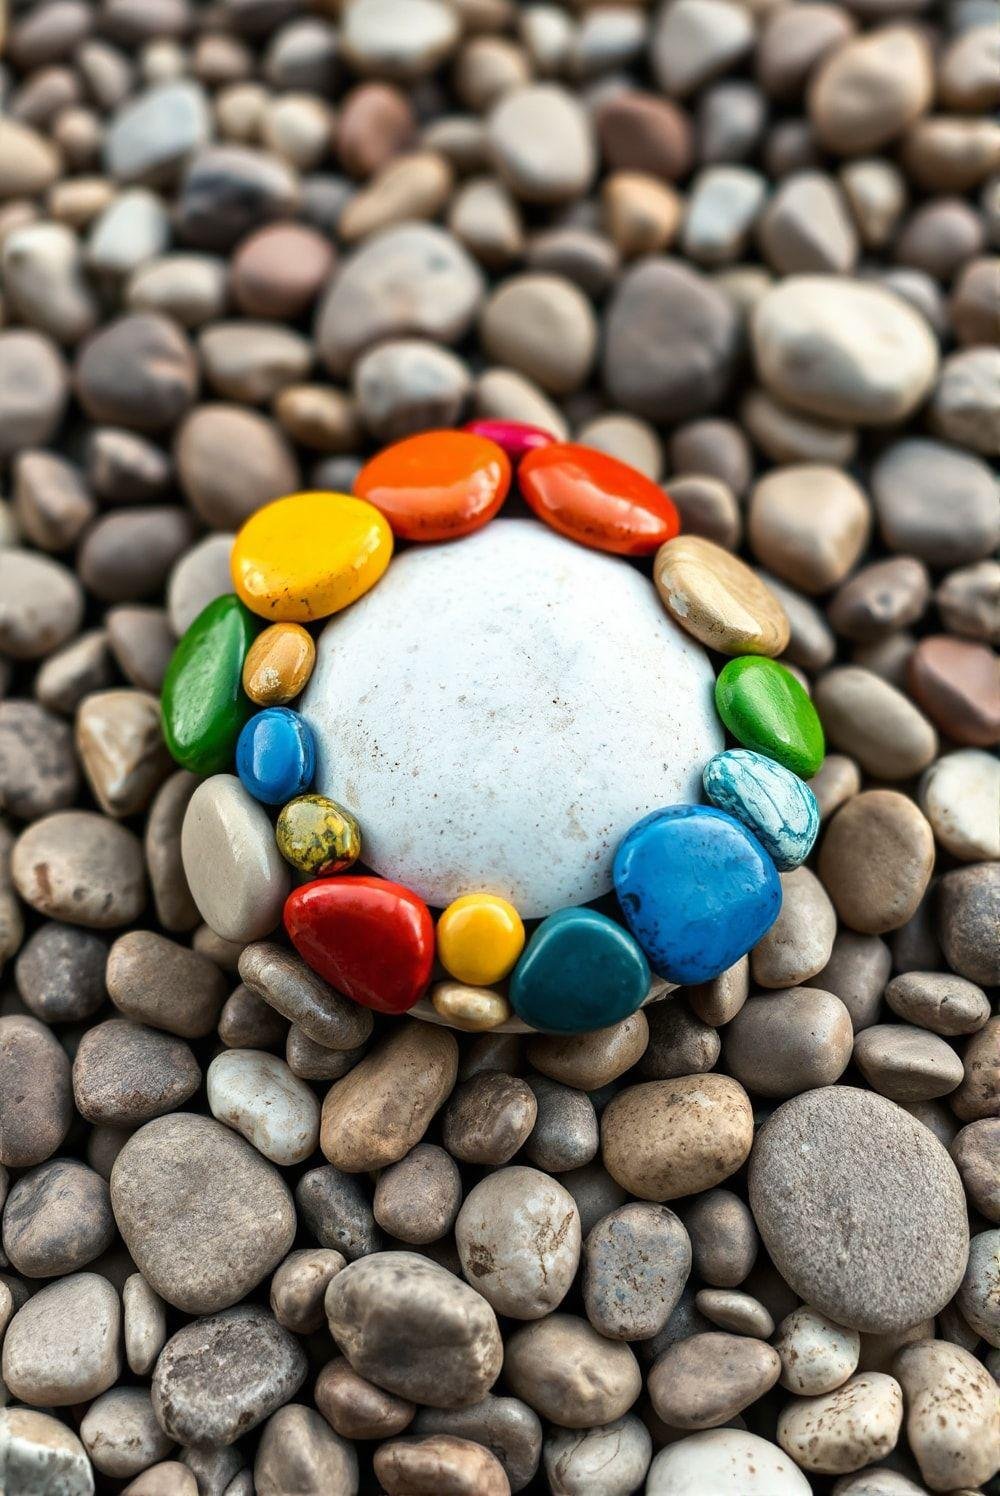
Create a unique Easter decoration using naturally found stones. Gather smooth, flat stones of various shapes and sizes. Clean the stones thoroughly and allow them to dry completely. Use acrylic paints in a variety of bright colors to paint the stones. Let your creativity guide you; you can paint simple patterns or create intricate designs.
Once the paint is dry, arrange the painted stones in the shape of a large Easter egg. You can use a template or freehand the design. For a more secure arrangement, you can use a strong adhesive to glue the stones together. Place the finished egg on a bed of natural pebbles for a stunning display.
This creative stone egg is a unique and eco-friendly Easter decoration. The natural materials and vibrant colors create a cheerful and eye-catching piece. The project is perfect for all ages and allows for a lot of creative freedom.
Miniature Easter Garden
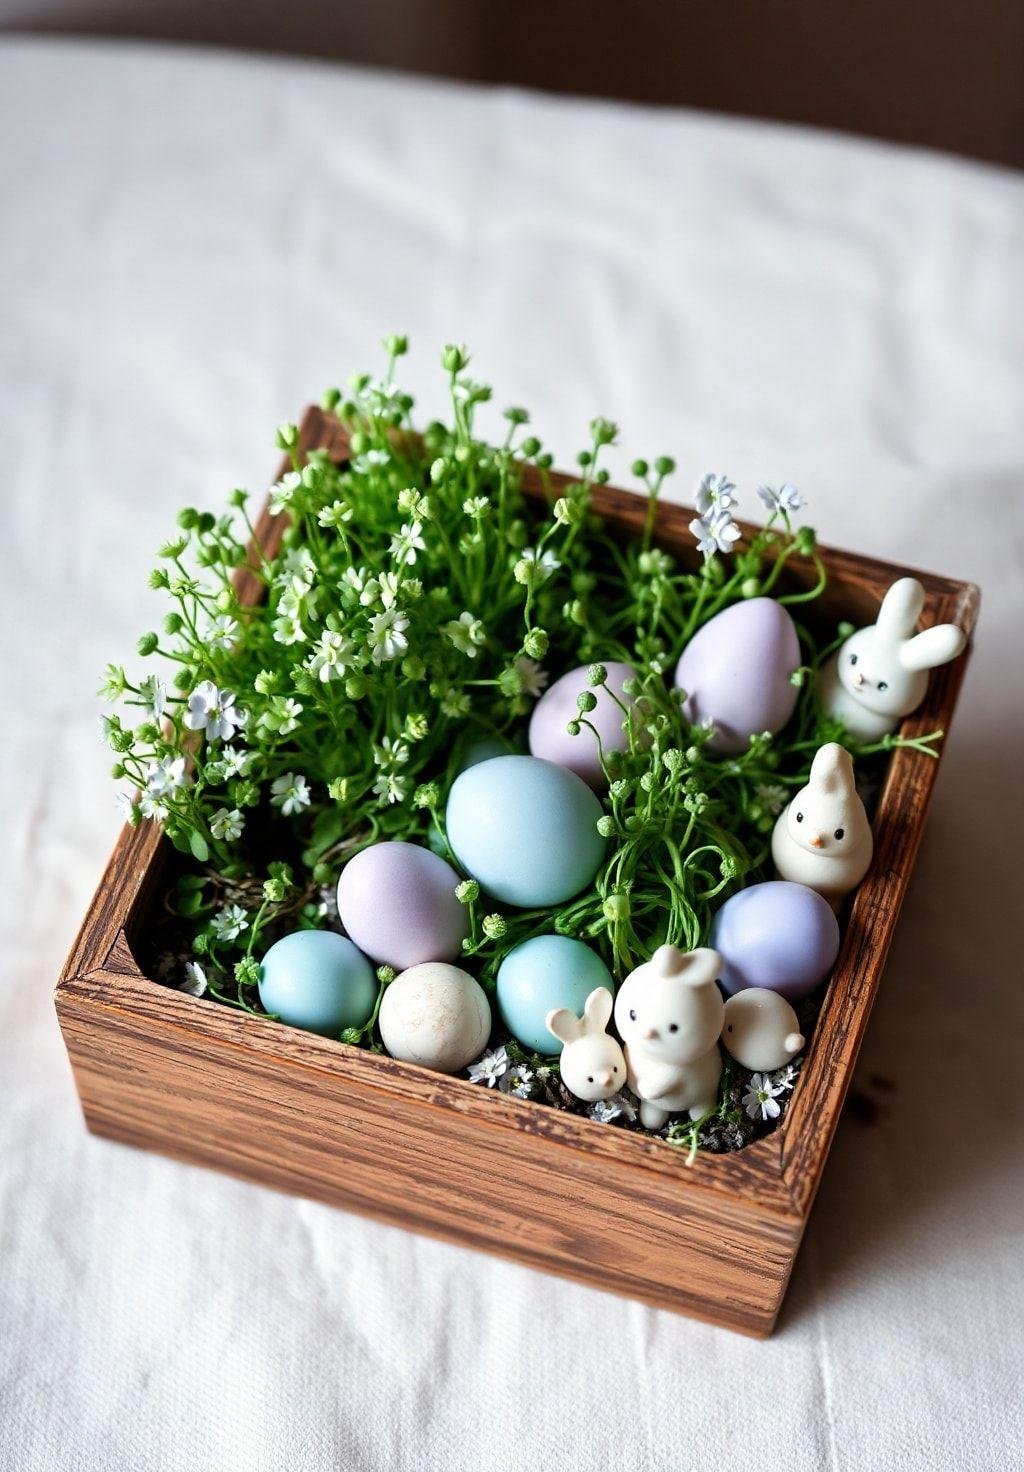
Create a charming miniature Easter garden in a shallow wooden box. Start by lining the box with moss or soil. Plant miniature succulents, herbs, or other small plants to create a lush landscape. Choose plants that are suitable for indoor environments and will thrive in a small space.
Add small, hand-painted Easter eggs to the garden. You can also include miniature ceramic figurines, such as bunnies, chicks, or lambs. Arrange the elements carefully to create a balanced and visually appealing scene. Consider adding small pebbles or decorative stones to enhance the garden’s aesthetic.
This miniature Easter garden is a delightful and unique addition to your Easter decor. Its charming scale and attention to detail create a captivating scene. It’s a perfect craft project for individuals or groups, fostering creativity and attention to detail.
Natural Twig Easter Wreath
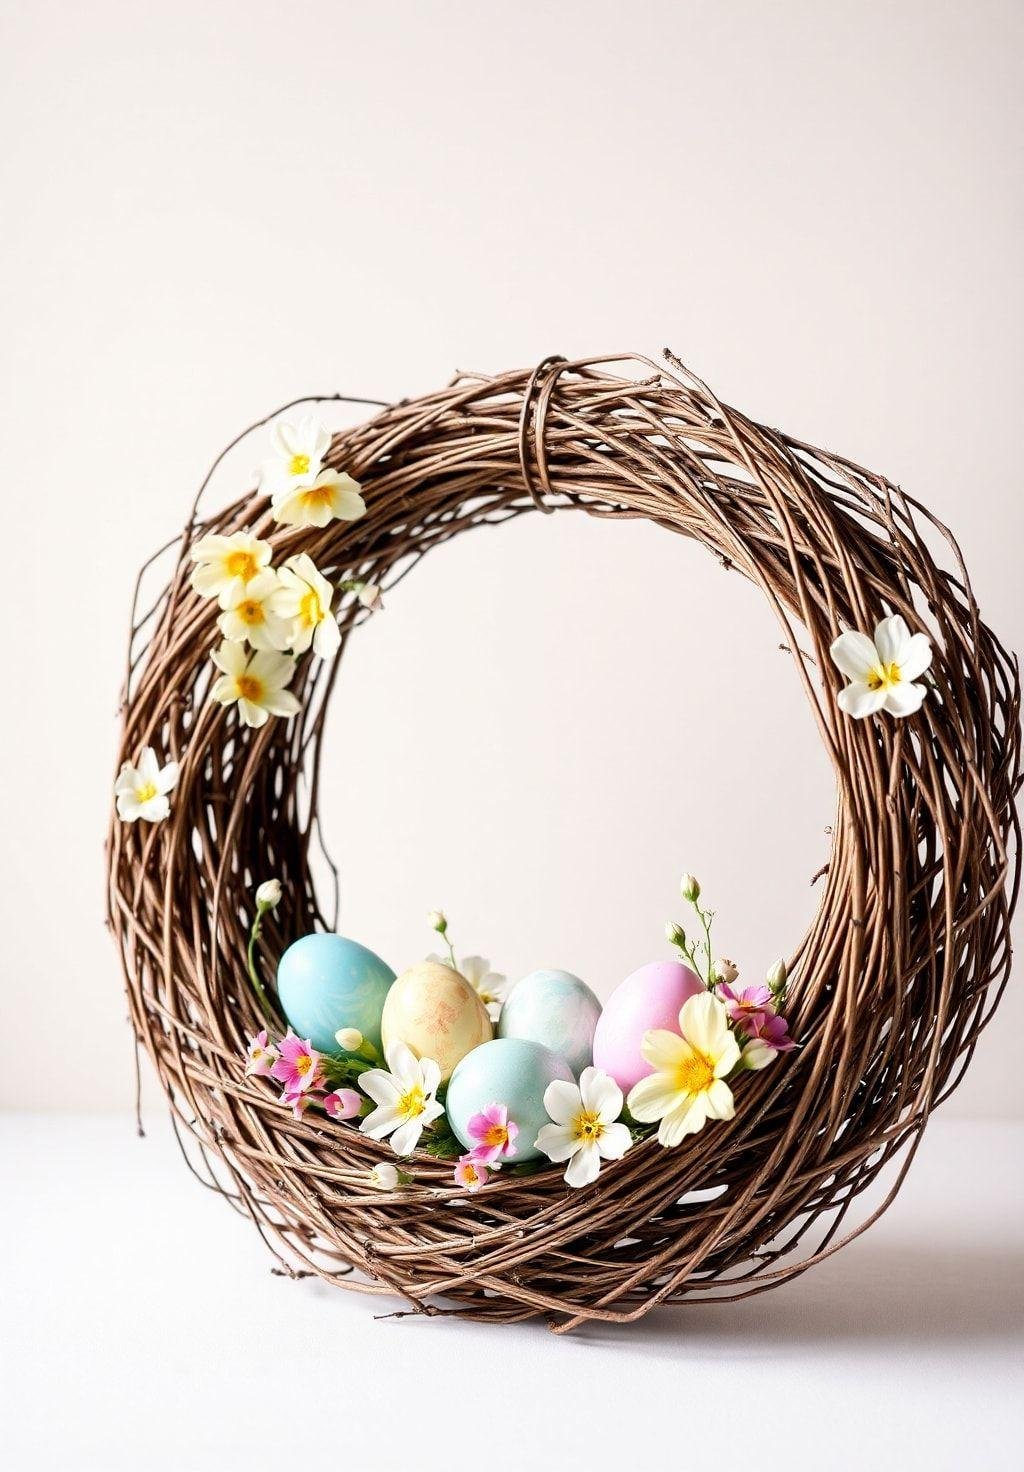
Create a vibrant Easter wreath using natural twigs and colorful elements. Start by creating a base wreath using flexible twigs or branches. Secure the ends together using twine or floral wire. Then, begin adding your decorative elements.
Use hand-painted Easter eggs in a variety of colors and designs. Incorporate fresh spring flowers, such as daffodils, tulips, or hyacinths. You can also add other natural elements, such as moss, ribbons, or small bird nests. Arrange the elements evenly around the wreath, creating a balanced and visually appealing design.
This natural Easter wreath is a beautiful and eco-friendly decoration for your home or office. The combination of natural materials and vibrant colors creates a festive and welcoming ambiance. It’s a perfect project for those who appreciate natural beauty and handcrafted items.
Charming Fabric Easter Bunnies
Sew a collection of adorable fabric Easter bunnies using simple sewing techniques. Choose a variety of colorful fabrics with different patterns and textures. You can use felt, cotton, or even scraps of old clothes. Cut out the bunny shapes using a pattern or freehand design.
Sew the pieces together, leaving an opening for stuffing. Stuff the bunnies with cotton or fiberfill. Close the opening using a hidden stitch. Embellish your bunnies with buttons, ribbons, or other decorative elements. Consider adding details like embroidered eyes or noses.
These charming fabric bunnies make wonderful gifts or decorations for your home. The variety of fabrics and embellishments allows for endless creative possibilities, making each bunny unique. The project is perfect for sewers of all skill levels, from beginners to experts.
Sparkling Beaded Easter Eggs
Create an elegant Easter egg using sparkling beads and glue. Start with a smooth, clean egg. Choose a variety of beads in different colors, sizes, and shapes. Use a strong adhesive, such as E6000, to attach the beads to the egg.
Begin by creating a design or pattern on the egg. You can use a template or freehand your design. Apply the adhesive to small sections of the egg and carefully place the beads in place. Work slowly and methodically, ensuring each bead is securely attached.
This beautifully beaded egg is a stunning and unique Easter decoration. The sparkling beads create a luxurious and elegant look. The project is perfect for those who enjoy detailed craftwork and appreciate a touch of glamour.
Naturally Dyed Easter Eggs
Dye Easter eggs using natural dyes for a unique and eco-friendly approach. Gather natural materials such as onion skins, turmeric, beets, or red cabbage. Boil these materials in water to create a colorful dye bath. Prepare your eggs by piercing small holes at the top and bottom to prevent cracking.
Place the eggs in the dye bath and simmer for various lengths of time to achieve different shades and intensities of color. Experiment with different combinations of natural dyes to create a range of unique colors. Once dyed, allow the eggs to dry completely.
These naturally dyed Easter eggs are a beautiful and eco-friendly alternative to commercially produced dyes. The unique colors and patterns created by natural dyes add a rustic charm to your Easter celebration. The project is perfect for those who appreciate natural beauty and sustainable practices.
Creative Paper Mache Easter Eggs
Create unique Easter eggs using the paper mache technique. Start by creating a base using balloons and strips of newspaper soaked in a paste made of flour and water. Allow the paper mache to dry completely before popping the balloons.
Once the eggs are dry, sand them smooth and paint them with a base coat of your chosen color. Then, use various techniques to decorate the eggs. You can use paint, glitter, fabric scraps, or even natural materials like seeds or leaves. Let your imagination run wild!
These paper mache Easter eggs are a versatile and creative craft project. The technique allows for endless possibilities in terms of decoration and design. The eggs can be used as decorations, gifts, or even as containers for small treats.
Yarn-Wrapped Easter Cross
Create a meaningful Easter decoration with this simple yarn-wrapped cross. Start with a plain wooden cross of your desired size. Choose pastel-colored yarn in shades that complement each other. Wrap the yarn around the cross, creating a textured and colorful surface.
You can vary the tightness of the yarn wrap to create different patterns and textures. Add small wooden beads to the yarn for added visual interest. Secure the ends of the yarn with a knot or glue. The finished cross can be hung on a wall or placed on a table as a centerpiece.
This simple yet elegant cross is a perfect addition to your Easter decor. Its pastel colors and textured yarn create a gentle and welcoming atmosphere. The project is easy to make and suitable for all ages.
Floral Easter Candles
Create beautiful Easter-themed candles using pastel-colored wax and dried flowers. Choose plain white or ivory candles as your base. Melt pastel-colored wax flakes or chips in a double boiler. Add dried flowers, such as lavender, roses, or daisies, to the melted wax.
Pour the melted wax onto the candles, ensuring the dried flowers are evenly distributed. Allow the wax to cool and harden completely. You can add multiple layers of wax and flowers to create a richer look. These unique candles make a beautiful and fragrant addition to your Easter decor.
These elegant Easter candles are a delightful addition to your home during the Easter season. Their pastel colors and delicate floral accents create a peaceful and festive ambiance. They also make wonderful gifts for friends and family.
Whimsical Felt Easter Mobile
Create a whimsical Easter mobile using felt shapes. Cut out various Easter-themed shapes from felt, such as eggs, bunnies, and chicks. Use a variety of colors and patterns to create a cheerful and vibrant mobile.
Attach the felt shapes to thin strings or ribbons. Tie the strings to a natural twig or a small wooden dowel. Adjust the lengths of the strings to create a balanced and visually appealing mobile. Hang the mobile from the ceiling or a window for a festive touch.
This charming felt mobile is a perfect decoration for children’s rooms or any space needing a touch of Easter cheer. Its playful design and soft felt materials create a gentle and inviting atmosphere. It’s a fun and easy craft project for all ages.